Category Archives: Practo Ray

Now See Doctor Timings On Calendar

Earlier, you could only see the clinic’s timings in the Calendar page. Now we’ve improved on that by letting you see the doctor’s timings.

So if the doctor is available in the clinic from 9:00 AM to 4:00 PM and takes a break between 12:00 and 1:00 PM..Doctor Timings

..you’ll see that the 12:00-1:00 slot has been greyed out, as per the timings you’ve mentioned in the Settings page.Docs Availablity

So anytime the doctor is not available, that slot will be greyed out in the calendar.

Exact quantity of drugs in Prescriptions

You can now see the number of tablets or capsules that the patient needs based on your prescription. After you enter the frequency and dosage, Ray calculates the number of tablets or capsules needed. So now you can see the exact quantity of pills needed.

Prescritption Screen

The quantity of tablets or capsules is also printed on the Prescription. This makes it easier for your patients, especially at the pharmacy.Prescription print out

A small improvement which we thought would go a long way.

Send SMS Payment Reminders to patients

Payment Reminder Banr

You must already be sending your patients Payment Reminders by email. But to make sure that the Reminder reaches them right away, an SMS is your best bet. Because everyone has their phones with them all the time. Also, an SMS is a non intrusive way of contacting your patients, and they’ll know that you respect their privacy.

So you now you have one less call to make. All you have to do is click a button and your patient will receive an SMS of how much they have to pay, along with your contact details.

You will be able to send one SMS a week, per patient. You’ll find it under the Send Payment Overdue option. Send Overdue Reminder If you’d like to know more, you can read the Help article here.

We think the best way to give you a stellar product is by listening to what you need. We hope we’ve done that here. So please keep the suggestions coming.

See Live Preview within Print Settings

One can never underestimate the importance of little things. A great example is how your Logo on a piece of paper, can add to your professionalism. And that is why we made it a priority to simplify Print Settings. It is now easier to make changes on the left and see the effects live on the right of your screen.

Settings Print

Make sure you take the tour by clicking on “What’s New” right next to the heading Print Settings

Four Small Changes that Bring Big Benefits

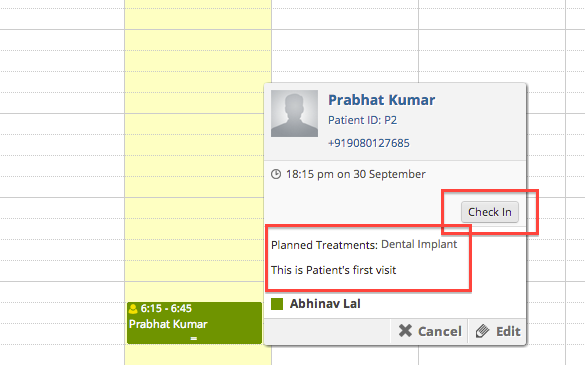
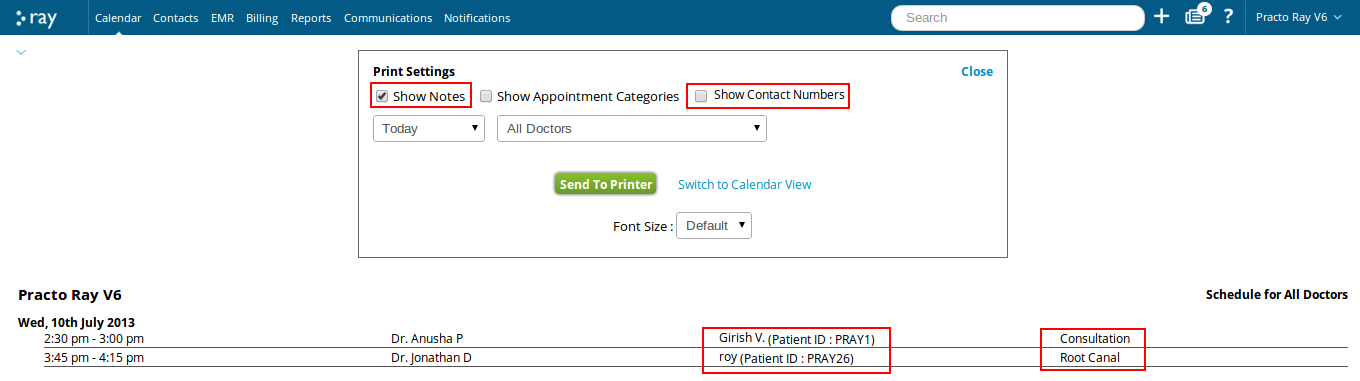
1. Know what a patient is coming for, even before they walk in.
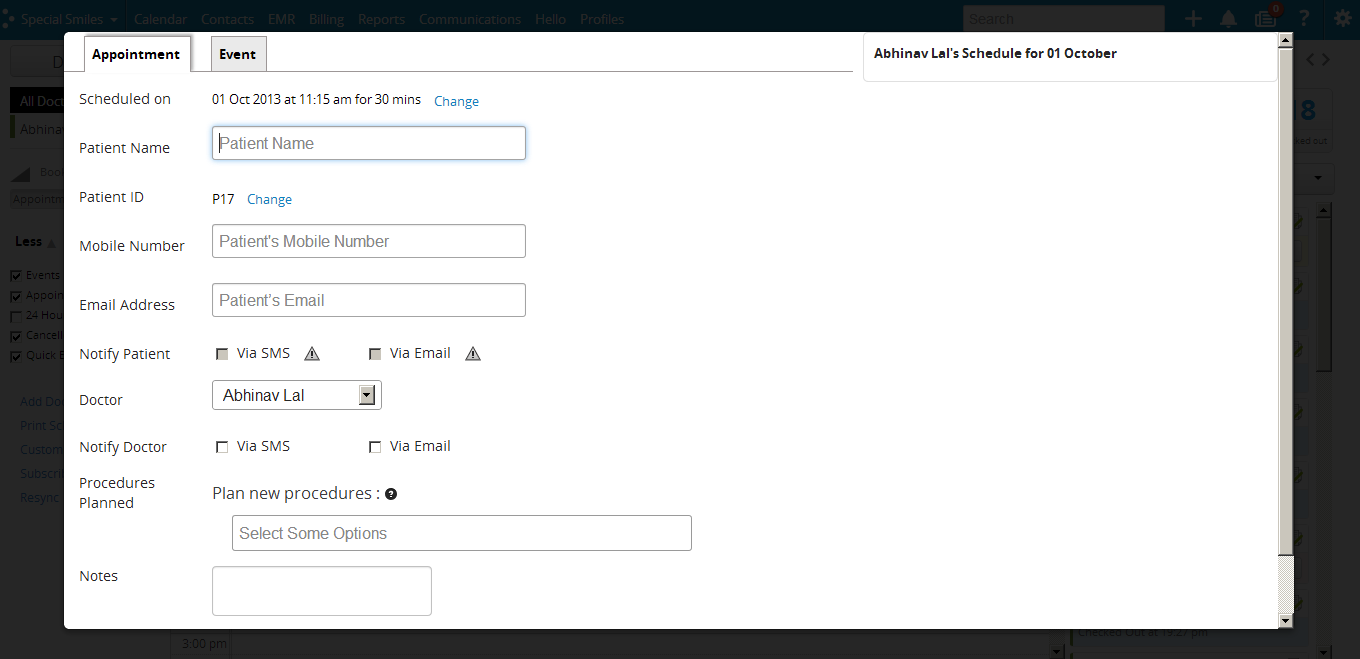
When you create an appointment you now have the option to specify what procedure the patient would be coming in for in that particular session.

planned treatments in appointments

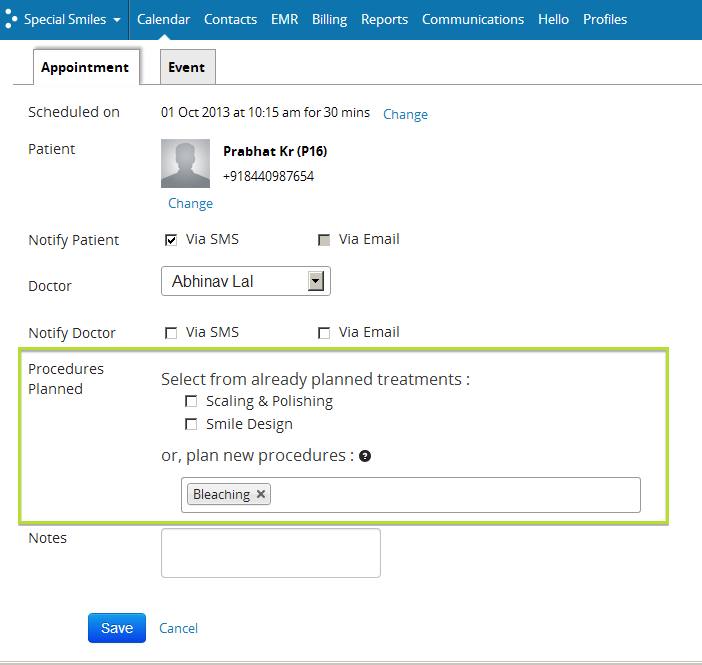
Based on the plan for the patient, choose an incomplete procedure from an existing Treatment Plan or even select a new procedure from the catalogue right when you’re booking the appointment. The best part is procedures that are selected from the procedure catalog are automatically added to a new treatment plan. So you can prepare for every patient even before they walk into your clinic.

Try it out for your next appointment. Click here to know more!

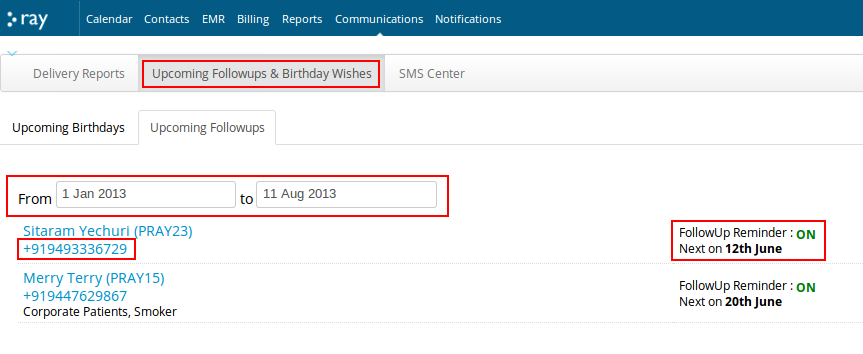
2. Investigations and other Treatment Notes within Clinical notes for better documentation
How often have you found yourself telling your patients about all the tests they need to do before they walk in next time and found that they’ve missed out on most of them? That won’t happen anymore thanks to a much needed addition in our Clinical notes feature. You can now add investigations for every patient along with their clinical notes.

investigations

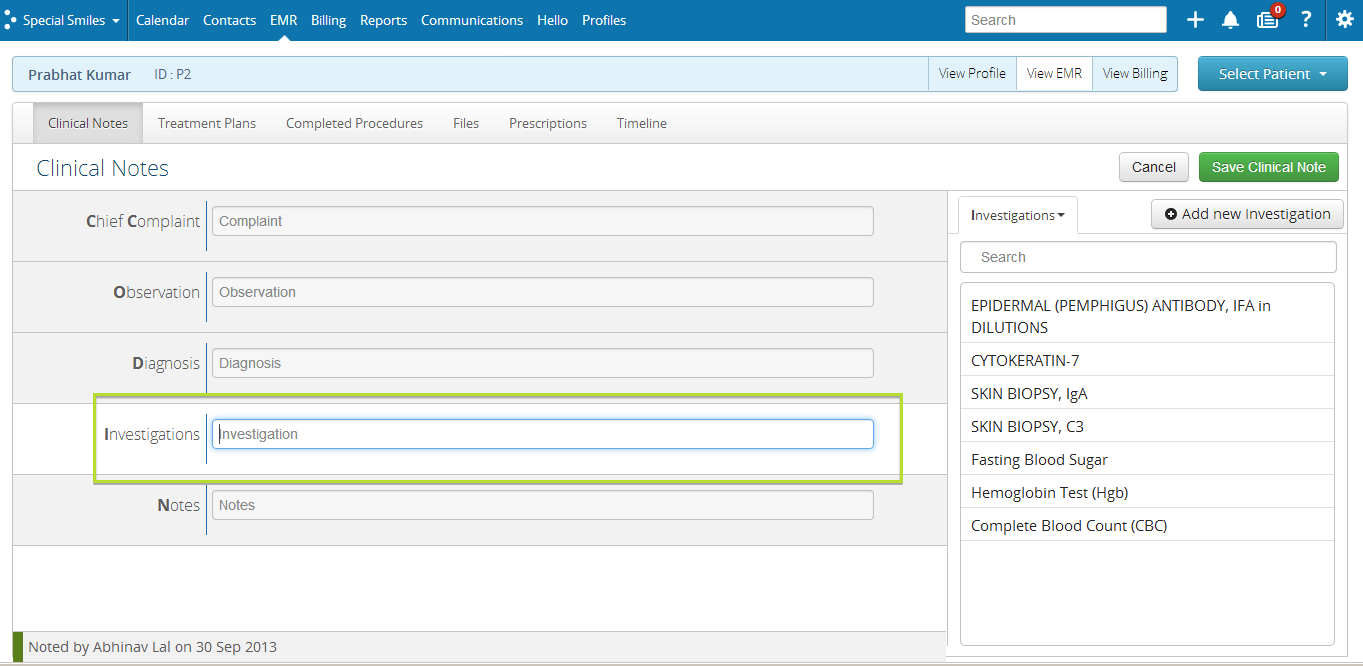
Any x-rays, blood tests or other requirements that a patient needs to undergo are documented along with other notes that help capture that patient’s progress after every appointment. Capture the patient’s height, weight or any such particulars that you might need to keep track of the patient’s progress.

The documentation for every patient is unique, now you can treat it that way  with the ‘Notes’ feature. Check out how to use the two new Clinical notes feature here!

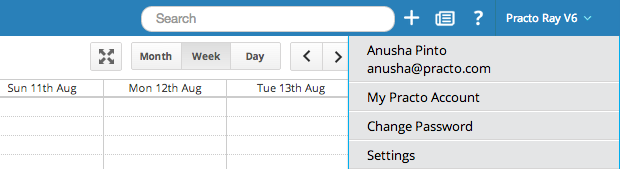
3. You’re logged in? Then, you’ll see your name in EMR automatically!
If you’re a doctor and you’re logged in, the drop down in Clinical Notes, Treatment Plans, Completed Procedures and Prescriptions will show your name automatically and not of the first doctor on the list. You no longer need to select it manually.

EMR doctor name

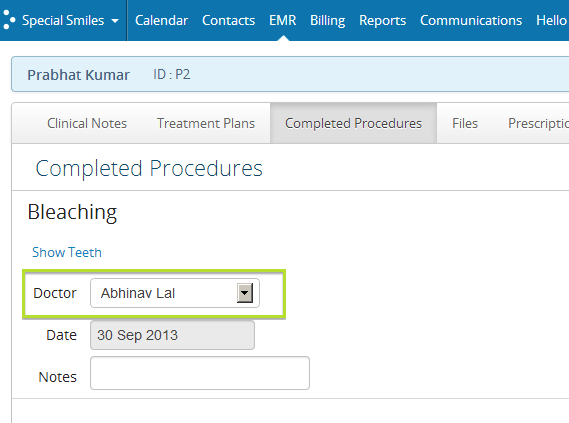
Now isn’t that a big relief!

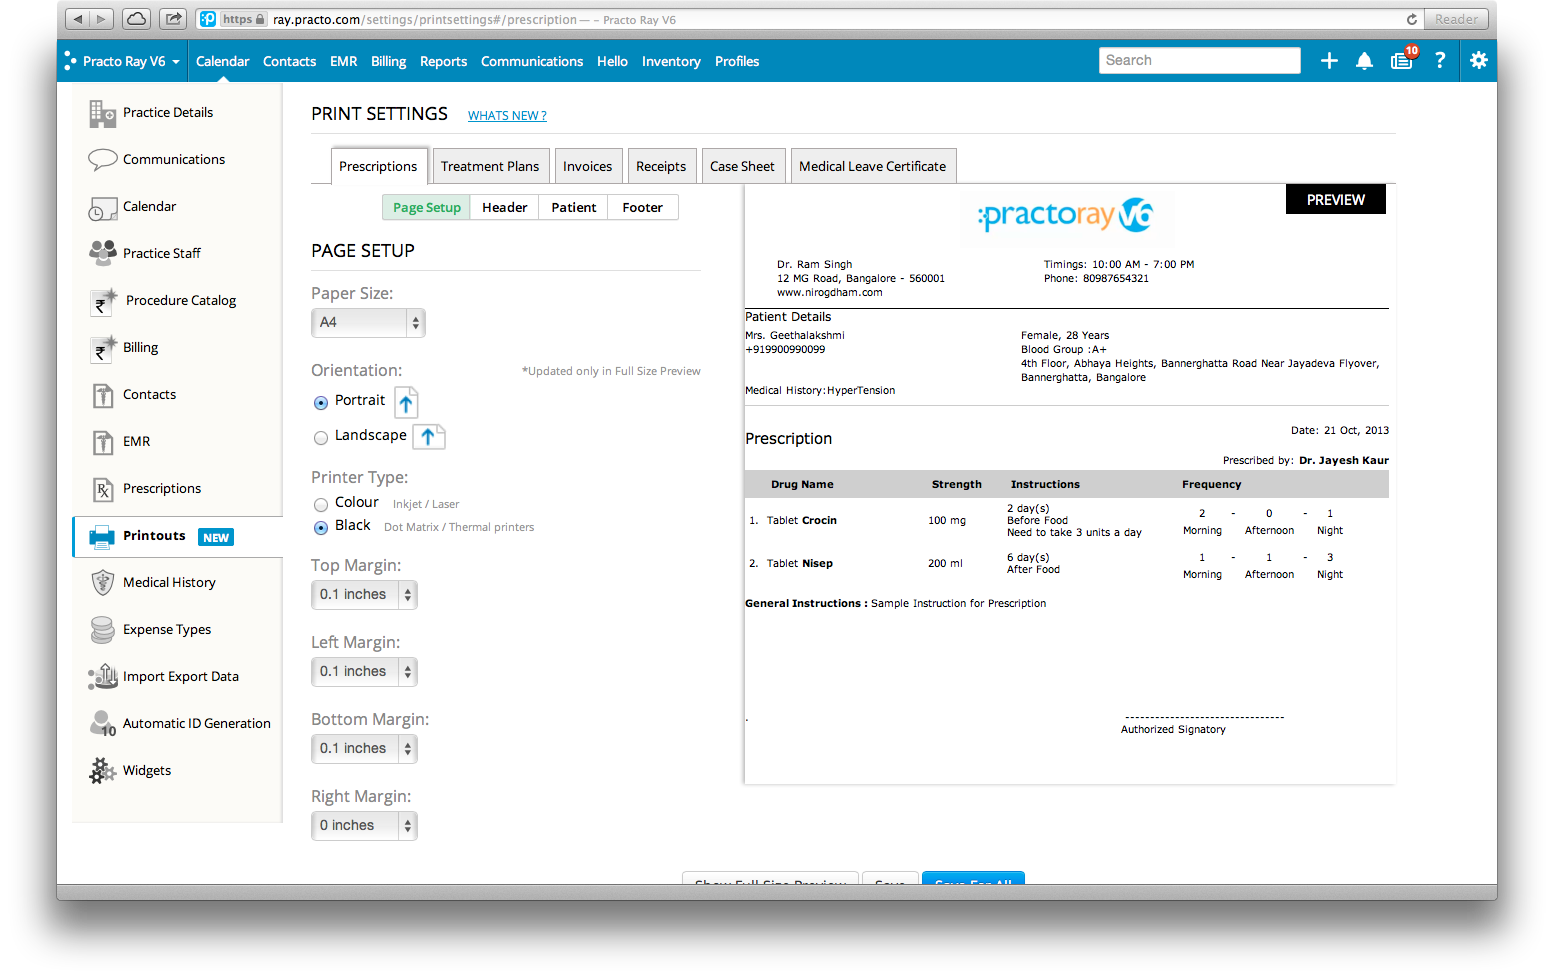
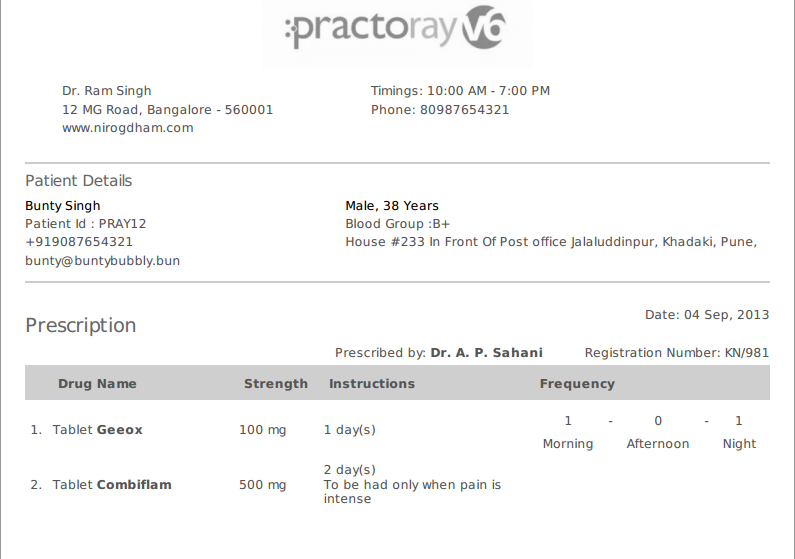
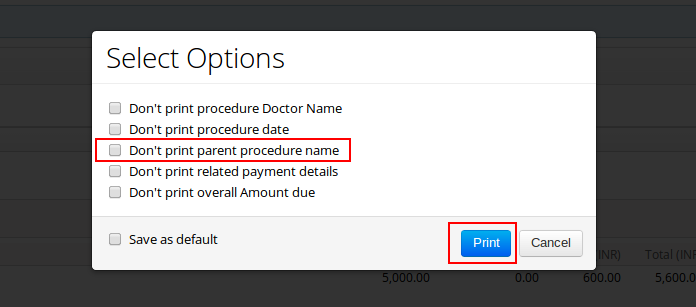
4. Thermal printouts are now easy on the eyes
Whether you’re taking your printouts on standard paper sizes(A4, A5 etc.) or on a custom size, your printouts will look just as professional. Printouts now depend on the size and width of the paper that you use.

What this means is that when printouts are taken on Thermal printers with a paper width that is less than 5 inches, the specifics in your printout would be arranged vertically.

printout-vertical2

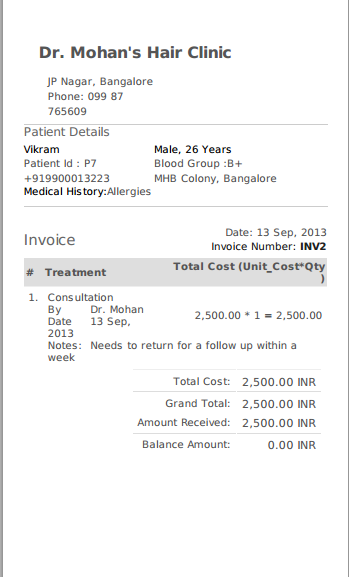
Only if your sheet width is over 5 inches your information would be printed horizontally.

printouthorizontal2

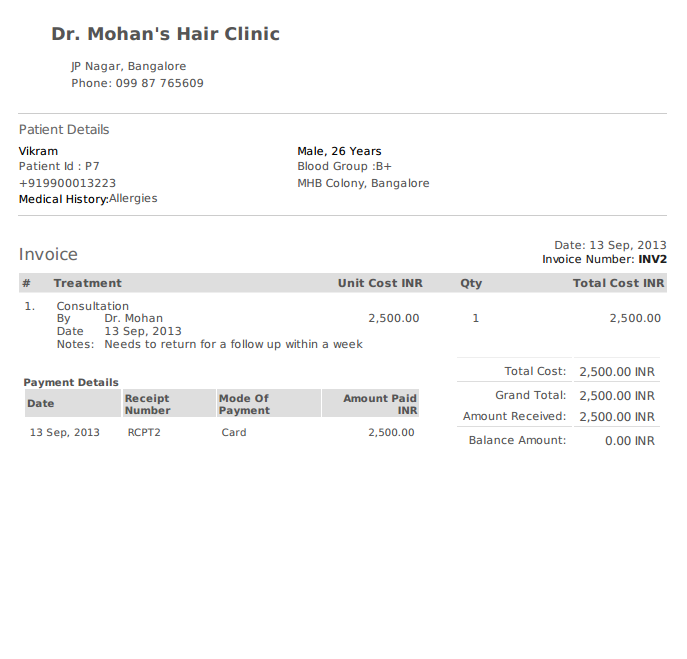
So there’s no more straining to read what’s written sideways or squeezing in loads of text in tiny spaces.

Simpler, neater printouts that are a pleasure to read.


Faster, Better Calendars!

We know that the best sight each morning is a full, brimming calendar and that’s exactly what we’re bringing you. Except, it’s faster and better.

Check-in patients, straight from their appointments
You no longer need to scroll down the patient queue to find a patient’s appointment and change their status once they’re at the clinic. When you hover your mouse over an appointment you will be able to find the Check-in, Engage and Check-out options to change the patient’s current status.

Check-in


Quick book option for adding appointments
It’s not just that. Our new ‘Quick book’ feature lets you book appointments without actually taking you to another page. This means easier, faster appointment booking for all those unexpected walk-ins! Learn how to enable and use ‘Quick Book’.

quickbook

View all available doctors at one shot
We’ve even improved our ‘Availability view’ so that you can see all the available doctors at the clinic and their appointment slots at one shot rather than having to go through each doctor’s availability one by one and schedule appointments without any hassle.

Calendar-availability view

Make a doctor available for appointments, outside their specified timings
Yes that’s possible. For those situations where doctors need to be available outside their specified timings, you can do this by using the ‘Availability View’ setting within your Calendar. Just hover over the time-slot that you wish to make the doctor available in, and click on ‘Make doctor Available’ in the dropdown. Know how to make a doctor available outside their specified timings. 

make doc available

Prescribe it like you think it

One of the key highlights of Practo Ray is how it helps doctors create prescriptions that are easy to understand for patients. But we’ve found a way to make those prescriptions even better by simplifying how you would add a new prescription. Read on to know how.

Add your prescriptions in the same way you would say it

You can now tell your patients which drug they need to take along with the frequency of dosage and any other instruction you might want to include in a single line. This improves the readability of prescriptions and also eliminates unnecessary scrolling as you can see all the drugs you have prescribed to the patient at one shot.


Prescriptions_1

The new prescription view not only makes it easier to add prescriptions but also allows for better review once you’re done with it.

Prescriptions_3


Don’t be restricted to just your drug catalogue

You can now add customized drugs to specific patient prescriptions. This means that your prescriptions are no longer limited to the drugs in your catalogue, you can even prescribe one-off drugs to patients in specific cases. These drugs will not be part of your overall drug catalogue but will appear in the particular patient’s prescription.

Prescriptions_4


A pleasure to prescribe and a treat to read

All these improvements in your overall prescription also allow you to have better printouts that are cleaner, better and easy to understand for your patients!

Prescriptions_6

BIG NEWS: My Practo Account – One Place to Manage All Your Purchases

This is Major! So read on till the end.

We constantly work towards being the simplest Practice Management Software for you. Here’s another move towards that goal. You now have a single page to manage everything you buy on the Practo platform. It’s called:

My Practo Account

From here you can:
– View all your Practice Subscriptions
– Check days left for your existing Subscriptions
– Renew Subscriptions
– Purchase New Subscriptions (Add Clinic)
– Purchase new Doctor Accounts
– Check Used Credits and Balance
– Recharge Credit
– Change your password
– Change your account information

This is how the page looks

My Practo Accounts

So What Changes?

– No separate pages for Subscriptions or Add ons. Just one My Practo Account page.
– All your existing Bulk SMS Add ons turn into equivalent credits. Where each SMS costs Rs.0.30. For e.g., if you have 100 SMS left in your Bulk SMS Add On pack, you will be given credit worth Rs. 33

Recharging Credits

When you want to recharge your mobile credits, on your My Practo Account page, to the right, under Credits, click on the button that says Recharge.

On this page, based your transaction, communication and promotional SMS requirement you can choose a Recharge Pack. 

Recharge credits

Renewing Subscriptions

On your My Practo Account page you can see the subscription days left for every clinic you own. Click on the Renew button and you’ll see the Practo Plans.

Here you can choose
– The type of plan
– The duration
– The number of doctor accounts (Be sure to check out the special offer)
(psst… We usually have early renewal offers which give you extra FREE months for the same amount.)

Buy Practo Subscription

Like it? Here’s how you get there

If you are on the latest version of Practo Ray i.e. Ray v6
On the Menu > Click on your Clinic’s name > Click on My Practo Account

V6 My Practo Account

If you are on the older version of Practo Ray
On the Menu > Click on Settings > Click on My Practo Account

V5 My Practo Account

So that’s the big change this week! Does it help you manage your purchases better? Let us know what you think at support@practo.com

Ray Updates: Easily Follow up with Patients and Customise Invoice Printouts

This week we released enhancements which give you better control on keeping track of follow ups and printing invoices.

Use the Date Filter to view upcoming Follow ups and Birthdays

You can now select a range of dates from the date filter to view a list of upcoming Follow ups and Birthdays, in that time period. This list also displays patients’ contact numbers. So in addition to automatic follow up reminders via SMS, it’s easier for you to call them up and remind them.

41

Hide Parent Procedure name on Invoice Printouts

You can now opt to not print ‘Parent Procedure’ name on the invoice printouts. Here’s how it is done:

1. Click on the ‘Billing’ section and go to ‘Invoices’.
2. Find the invoice you want to print.
3. On the right you will see a ‘Print’ button.
4. Click on the dropdown arrow next to it and select ‘Customize Print’.

43

5. Then click on the checkbox against ‘Don’t print parent procedure name’.

Printout Options

And that’s how you can hide parent procedure name on your invoice printouts.

That’s it for this week. Have a great weekend!

Ray Updates: Calendar Enhancements

We just released a couple of small enhancements which will help you manage your schedule better.

Print Schedule now has appointment notes

You can now Print schedule with the option to hide Patient contact numbers and show appointment notes. This gives you quick overview of the appointments scheduled with various consultants at your clinic. The appointment notes keep you prepared for the treatment, that patient will be coming in for.

22

View Patient Queue information of a particular doctor

On the Calendar page,to your left you will find a doctor list. When you click on a name from that doctor list you will not only be able to view the appointments scheduled for that doctor but also the patient queue information specific to him/her. This gives you a better insight on the waiting time caused by every consultant at your clinic.

21

Hide cancelled appointments

You can now opt to hide cancelled appointments. Here’s how it is done. On your Calendar page, to your left at the bottom, you will find a drop down arrow next to ‘More’. Click on it and uncheck the check box that says ‘Show Cancelled Appointments . This helps clinics manage their busy schedule and keep their Calendars neat and uncluttered with the cancelled appointments no longer appearing in grey boxes.

24

There are more updates coming up this week. Stay tuned.